
Bringing Walls to Life, Digitally! Worldwide Shipping. Unmatched Quality.
Instructions to use for our products.
Transforming your space with vinyl wall stickers is an exciting way to refresh your home’s look without committing to permanent changes. This step-by-step guide will help you apply your new Wall Stickers flawlessly.
Start by unrolling your wall art on a flat surface. Place books or other heavy, flat objects on top to help it flatten. Don’t worry if the wall art remains slightly wavy, it will not affect the final application.
Before applying the wall sticker, make sure the surface is clean and free from dust, grease, bumps, and holes. Gather your tools, including an applicator or a store or credit card if you don’t have one, and some masking tape.
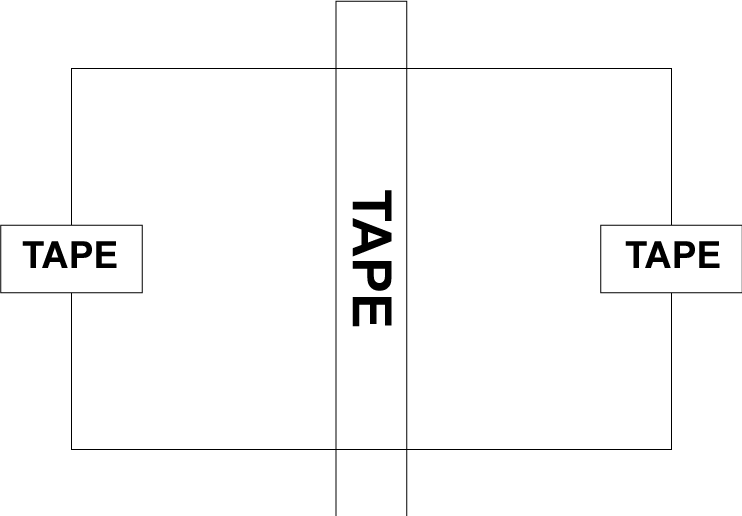
Tape the wall art in place on your desired wall spot with the application backing still attached. Then, secure a strip of tape down the middle of the wall art to firmly attach it to the surface.
Follow these steps to apply your wall sticker:
You have successfully attached your wall sticker! For any issues or inquiries, please don’t hesitate to contact us. If you’re pleased with your new wall art, consider giving us a rating or review to help us grow. Thank you!
| Cookie | Duration | Description |
|---|---|---|
| cookielawinfo-checkbox-analytics | 11 months | This cookie is set by GDPR Cookie Consent plugin. The cookie is used to store the user consent for the cookies in the category "Analytics". |
| cookielawinfo-checkbox-functional | 11 months | The cookie is set by GDPR cookie consent to record the user consent for the cookies in the category "Functional". |
| cookielawinfo-checkbox-necessary | 11 months | This cookie is set by GDPR Cookie Consent plugin. The cookies is used to store the user consent for the cookies in the category "Necessary". |
| cookielawinfo-checkbox-others | 11 months | This cookie is set by GDPR Cookie Consent plugin. The cookie is used to store the user consent for the cookies in the category "Other. |
| cookielawinfo-checkbox-performance | 11 months | This cookie is set by GDPR Cookie Consent plugin. The cookie is used to store the user consent for the cookies in the category "Performance". |
| viewed_cookie_policy | 11 months | The cookie is set by the GDPR Cookie Consent plugin and is used to store whether or not user has consented to the use of cookies. It does not store any personal data. |